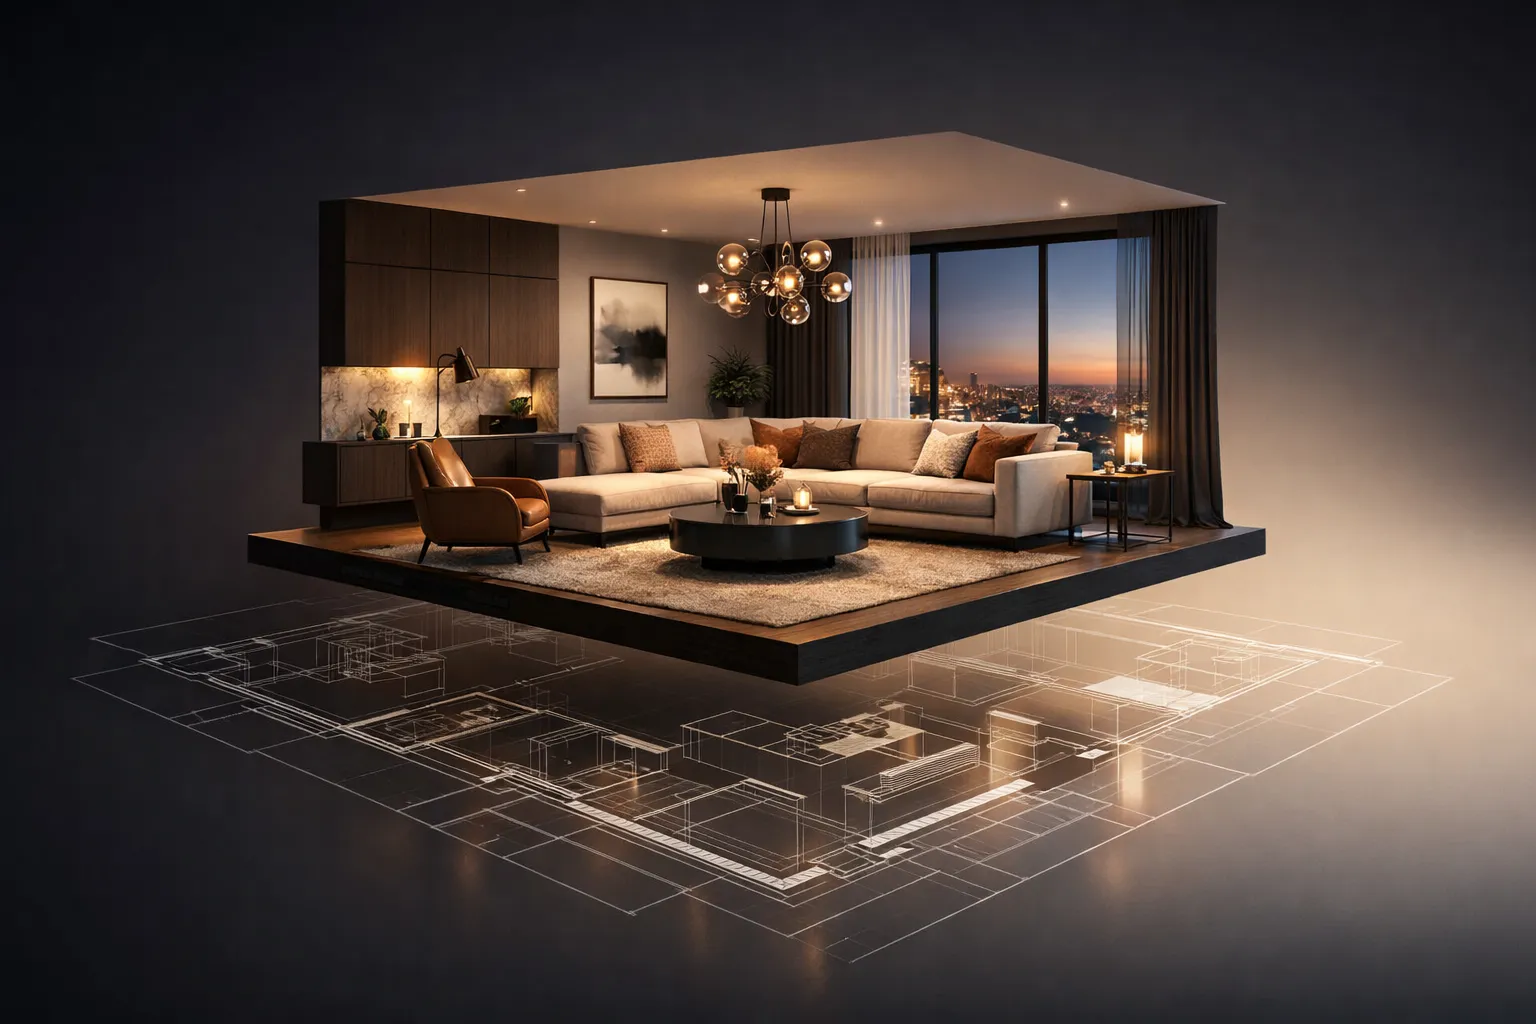
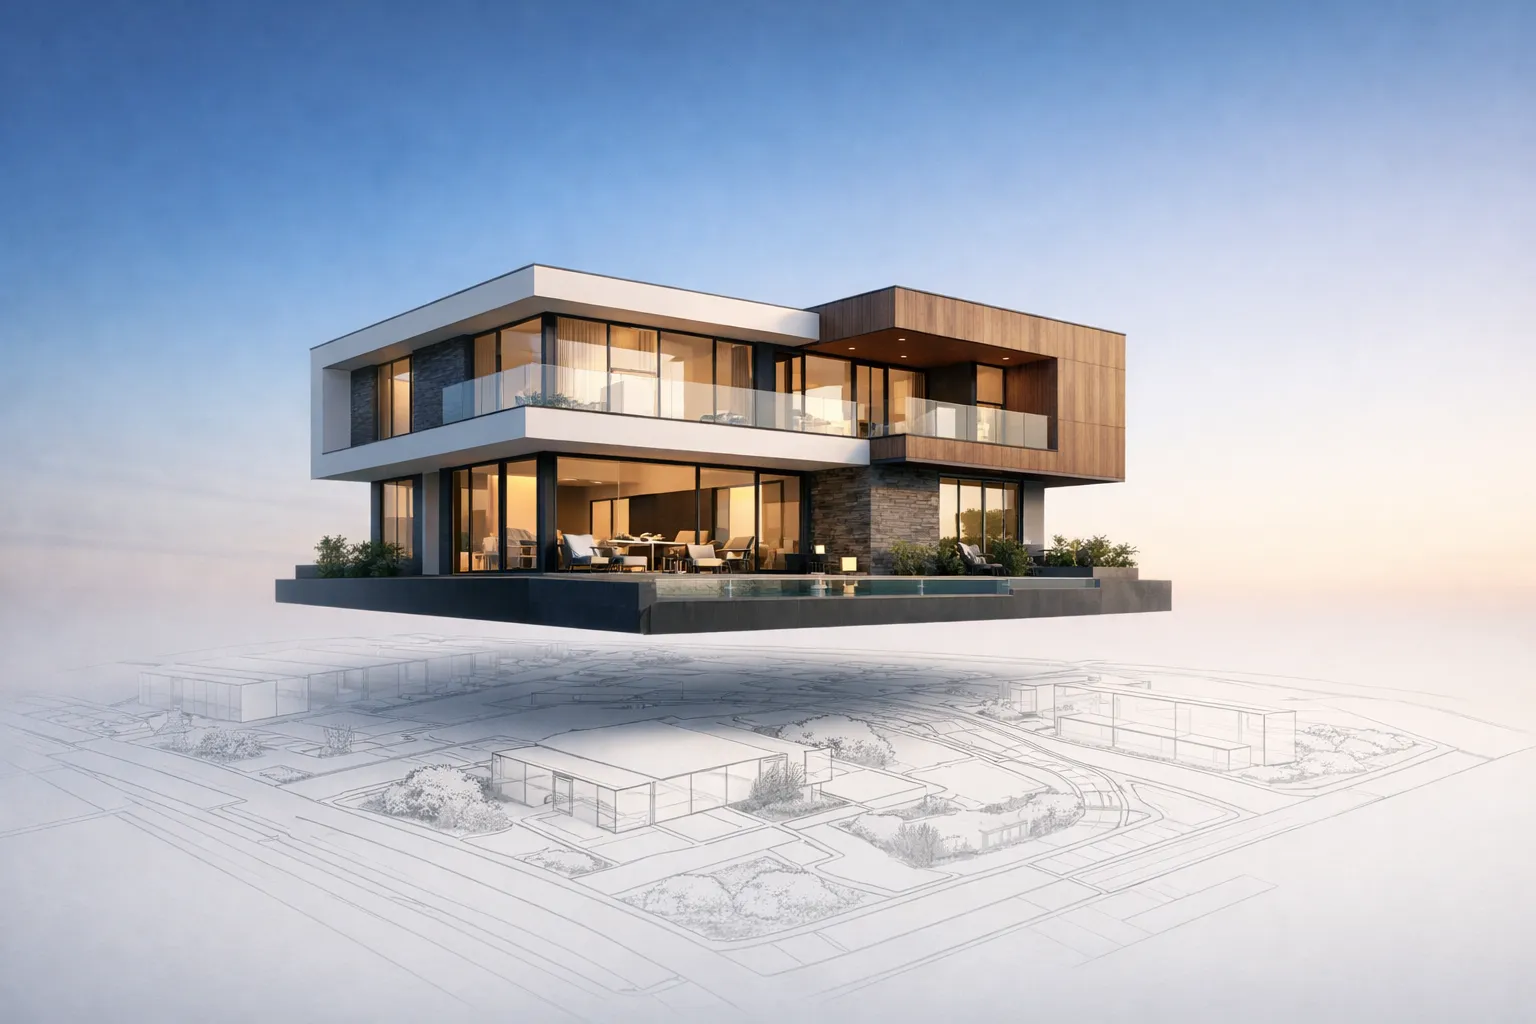
3D interior rendering is a digital image of a room that doesn’t exist yet. It looks like a professional photograph – accurate lighting, real materials, actual furniture models – but the space hasn’t been built. Or it’s about to be gutted and redesigned.
A 3D artist takes your floor plans, material picks, and design direction, then builds the whole thing digitally. The output is a photorealistic image you can show to clients, investors, contractors, or your Instagram audience.
Industry reports from major design software providers indicate steady growth in the adoption of 3D visualization tools among design firms over the past decade. This isn’t emerging technology anymore. It’s table stakes.
What Is 3D Rendering in Interior Design?
Think about how interior designers used to present ideas. Mood boards. Fabric swatches. A lot of “picture this, but warmer.” The client nods, signs off, and then, three months later, stands in the half-finished kitchen, saying, “This isn’t what I imagined.”
That disconnect costs real money. Change orders, delayed timelines, strained relationships.
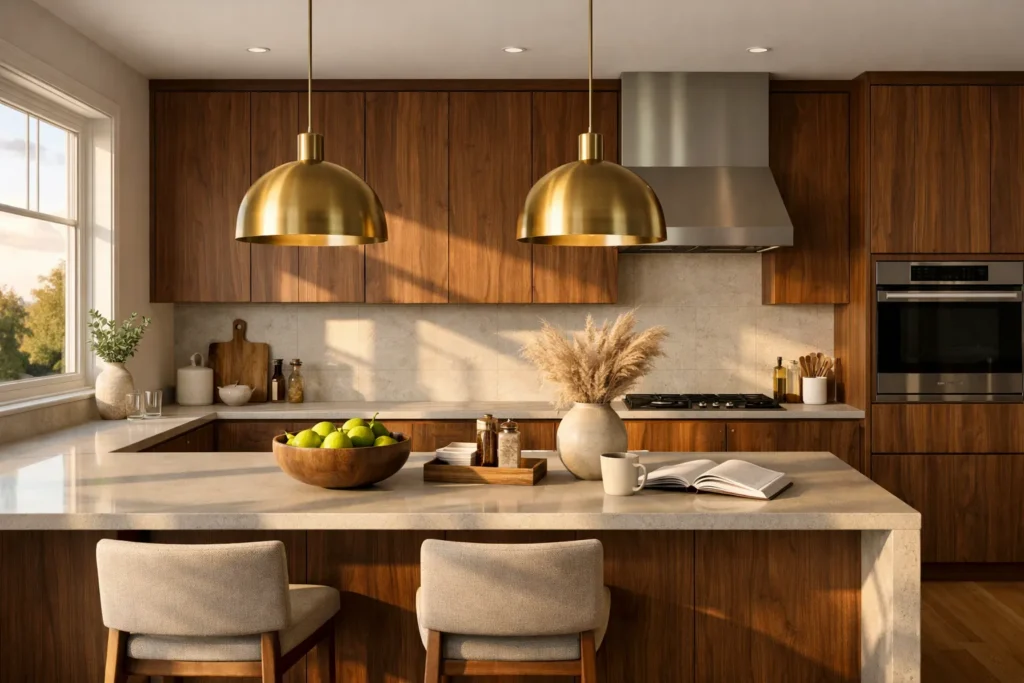
3D rendering for interior design eliminates the guessing game. Instead of describing a walnut island with brass pendants and afternoon light from the west window, you show it. The conversation moves from “trust me” to “look at this.”
Rendering plugs into nearly every stage of a project:
Early concepts – test layouts and palettes before anyone commits to anything
Client presentations – replace verbal descriptions with proof
Builder coordination – give contractors an unambiguous visual reference
Marketing – build your portfolio without waiting for construction to finish
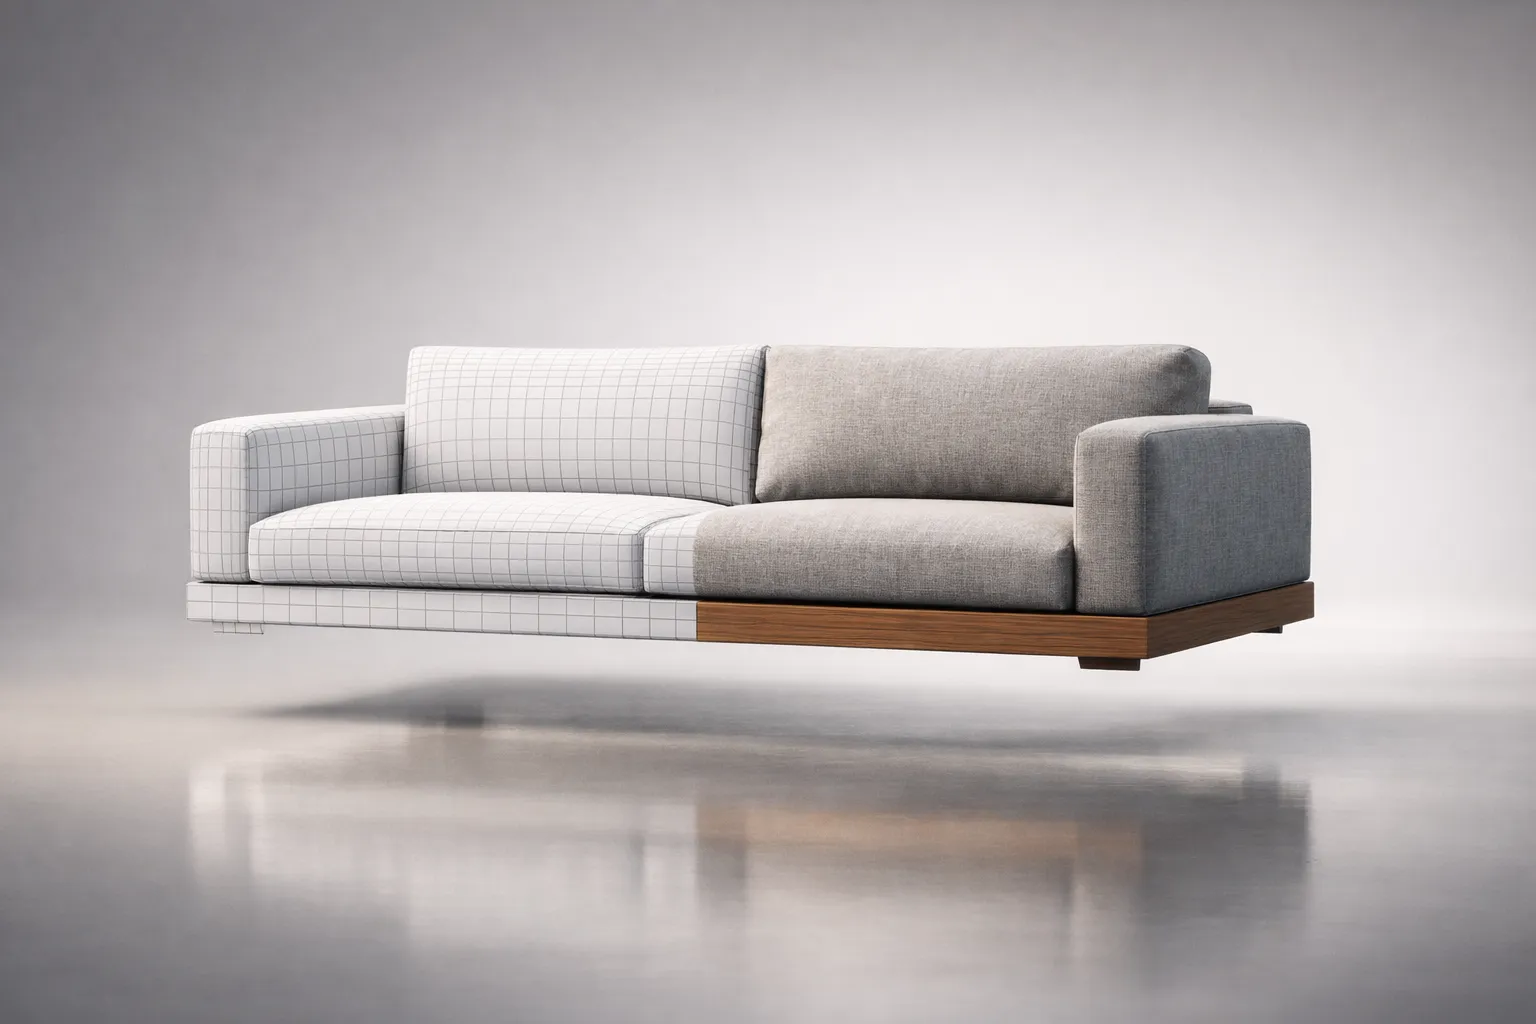
How 3D interior visualization differs from 3D modeling
These get confused all the time. They’re related but different.
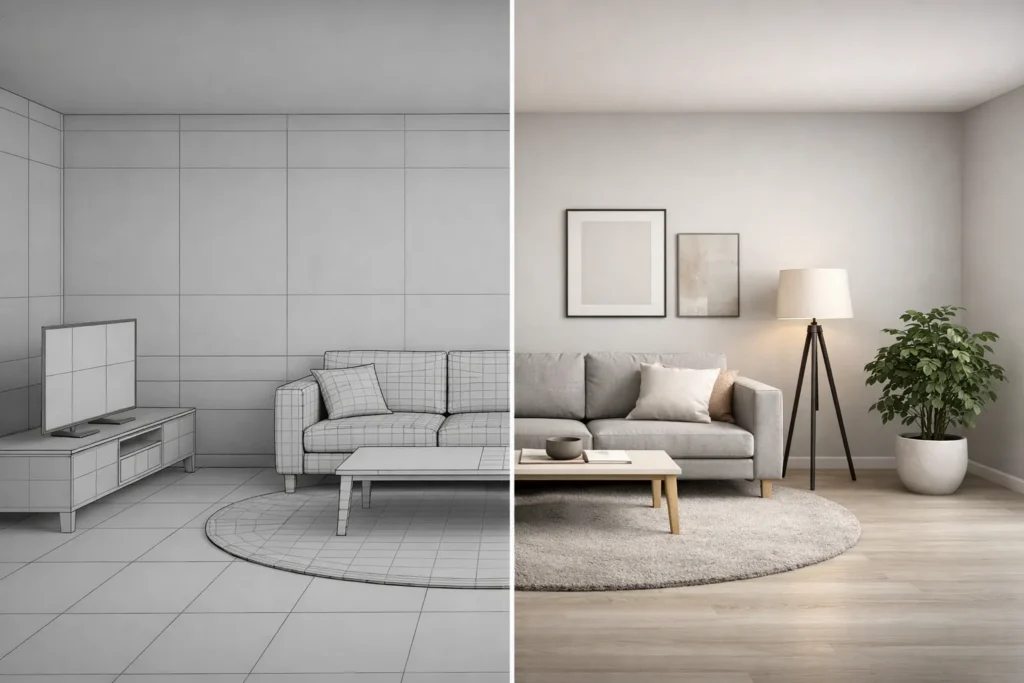
3D Modeling
3D Interior Visualization
What it is
Building the digital geometry – walls, furniture, fixtures as wireframes
Adding materials, lighting, and camera work to that geometry, then producing a finished image
Output
A 3D file (.3ds, .obj, .fbx)
A high-res image, animation, or interactive walkthrough
Who does it
3D modelers, CAD technicians
Visualization artists, rendering studios
The simplest way to think about it: interior design 3D modeling builds the stage. Visualization lights it, dresses it, and photographs it. Both are essential. On bigger projects, different people handle each one.
3D interior rendering vs interior photography: how to tell them apart
At the top end, you genuinely can’t. But the practical differences are significant:
Photography requires a finished, built space. Rendering doesn’t.
Photography is limited by real lighting and real angles. A render can simulate golden-hour sun in a north-facing room with no windows on that wall.
Swapping a sofa fabric from gray to navy takes 20 minutes in a render. In photography, it’s a full reshoot.
In many U.S. markets, a professional interior photoshoot can range from approximately $1,500 to $5,000 per space, depending on scope and location. A photorealistic render averages $300 – $800.
The honest trade-off: photographs capture the warmth and messiness of real life. Rendering has to manufacture that. The best artists know this – they add a rumpled throw, a half-read book on the nightstand, a coffee ring on the side table. Those small imperfections are what make a render feel real instead of sterile.
How Does 3D Interior Rendering Work?
The process is more straightforward than most people expect. Knowing the steps helps you prepare better briefs and avoid the revision cycles that eat everyone’s time and budget.
1. Preparing floor plans, elevations, and material references
Good output starts with good input. The rendering team needs:
Floor plans (PDF, DWG, or RVT) with accurate dimensions
Elevations and sections – ceiling heights, window placements, built-in elements
Material references – product links, swatch photos, or spec sheets
Inspiration images – anything that captures the mood you’re after
One thing I’ve seen trip up designers repeatedly: vague briefs. “Modern minimalist kitchen” can mean a hundred different things. “White oak flat-panel cabinets, Caesarstone 5143 White Attica countertop, matte black Fantini faucet” means exactly one thing. The specific brief gets a better result in fewer rounds. Every time.
2. 3D modeling workflow: building the room from CAD/BIM or 2D drawings
The artist imports your plan into 3ds Max, SketchUp, Blender, or Revit and starts constructing:
Walls, floors, ceilings extruded from the 2D layout
Windows and doors placed per elevations
Built-ins modeled to spec – islands, vanities, closets
Furniture and décor either custom-built or sourced from 3D libraries
A standard residential room can take anywhere from several hours to a full day at this stage, depending on complexity and available documentation. Complex commercial spaces with custom millwork can run two to three days.
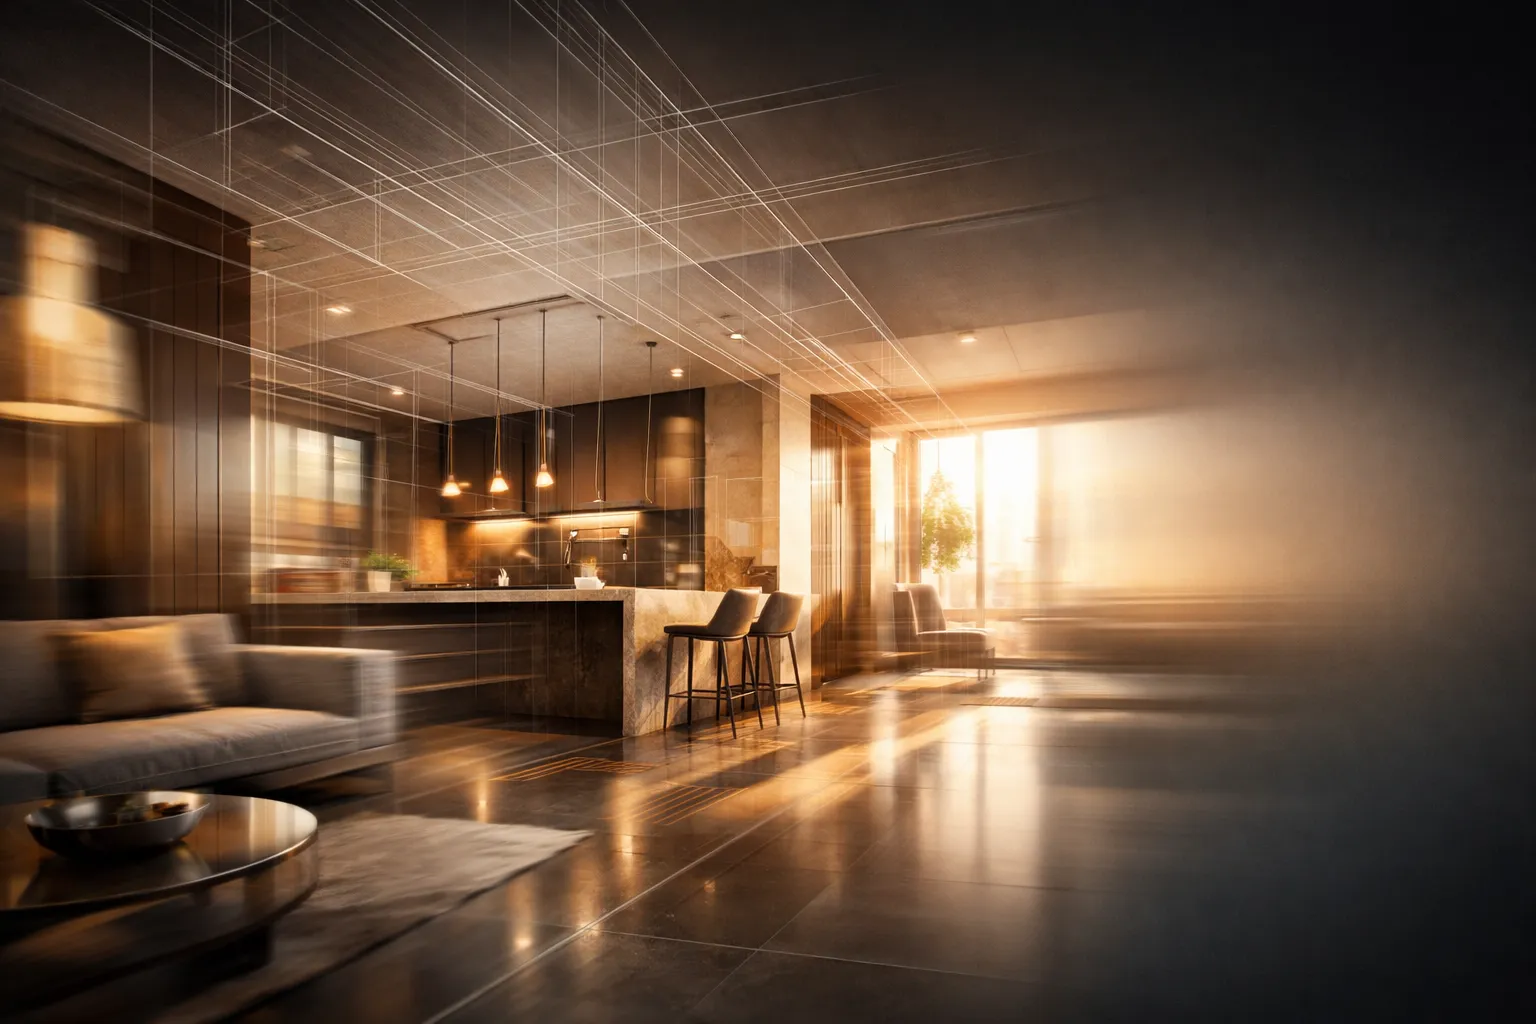
3. Applying materials, textures, and realistic lighting
This is where the image crosses from “3D model” to “that looks like a photograph.” Every surface gets assigned a material:
Walls – paint matched to Benjamin Moore or Sherwin-Williams codes, wallpaper, stone
Fabrics – weave, color, how light passes through sheers
Metals – brushed vs polished, brass vs chrome, patina effects
Then comes lighting – and this is where the real skill shows up:
Natural light – sun position based on location, time of day, season
Artificial light – recessed cans, pendants, sconces, LED strips, each with accurate color temperature
Bounced light – how illumination reflects between surfaces, creating soft shadows and color bleed
Here’s the truth: a perfectly modeled room with bad lighting looks fake. A simple room with beautiful lighting looks like it belongs in Architectural Digest. Lighting is the single biggest factor in whether a render convinces or falls flat.
4. Choosing camera angles that highlight the interior space
Same principles as architectural photography:
Eye-level (around 4 – 5 feet) feels natural
Low angles emphasize ceiling height and drama
Vignettes focus on details – a styled shelf, a vanity, a fireplace
Wide-angle (24 – 35mm) captures more room but distorts if pushed too far
Most projects need 3 – 5 angles. One hero shot, a couple of supporting views, one or two detail close-ups.
5. Enhancing the final image through post-production
The render engine produces a raw image, which can take anywhere from under an hour to several hours per frame depending on hardware, resolution, and scene complexity. Then the artist takes it into Photoshop for:
Color correction and contrast
Atmospheric touches – subtle haze, depth of field
2D additions – the view outside windows, artwork on walls
Sharpening and cleanup
This isn’t about faking anything. It’s about matching the polish people expect from professional photography.
What Are the Main Types of 3D Interior Rendering?
Photorealistic 3D interior renderings for marketing and client approvals
The core product of any established 3D interior rendering company. Images realistic enough to be mistaken for photographs. Used for client sign-offs, real estate marketing, portfolio work, and editorial content.
Conceptual interior renders for early-stage design exploration
Faster, less polished, and perfectly fine for the schematic phase. These focus on spatial feel and mood rather than pixel-perfect accuracy. Often produced in real-time engines like Enscape or Twinmotion. Ideal for comparing two or three directions without burning through the budget.
3D floor plan rendering: top-down views for quick understanding
A 3D room rendering seen from above – like a dollhouse with the roof removed. Surprisingly effective for showing furniture layout, traffic flow, and spatial relationships. Real estate agents love them because buyers grasp the space immediately.
360° interior rendering and virtual walkthroughs (VR-ready visuals)
The viewer looks in every direction from a fixed point – or navigates through the entire space. Delivered as browser-viewable panoramas or full virtual tours with connected viewpoints.
3D interior animation: when motion helps sell the space
A 30- to 90-second video moving through the interior, the way a person would walk through it. Best suited for luxury residential, hospitality pitches, and social media – where video outperforms stills by 2 – 3x in engagement.
Why Use 3D Interior Rendering?
Six reasons that actually matter:
Catch mistakes before they get expensive. Changing a wall finish in a render typically costs a small revision fee, while changing it after installation can result in thousands of dollars in labor and material costs. The math is simple.
Speed up approvals. Clients who can see the finished result decide faster. Studios that actively use interior design visualization often report noticeably faster approval cycles compared to projects presented only with drawings and mood boards.
Charge more. Designers who present photorealistic visuals are perceived as more capable. Industry surveys suggest that firms presenting high-quality visualizations are often perceived as more premium, which can positively influence their fee positioning. The renders more than pay for themselves.
Market your work before it’s built. No waiting for construction and photography. Your portfolio grows with every project, not months after it.
Collaborate remotely. Clients in another city, contractors across town, consultants overseas – everyone reviews the same image without visiting the site.
Iterate cheaply. Five color schemes in a 3D scene: minutes. Five color schemes in real life: five paint samples, five days, and a painter who’s running out of patience.
Where Is 3D Interior Rendering Used Most Often?
Residential interior design for homes and apartments
This is where most designers first encounter rendering. 3D house interior design visualization matters most in the rooms where costs run highest – kitchens, bathrooms, open-plan living spaces. When a homeowner is about to spend $80,000 on a kitchen renovation, showing them exactly what they’ll get isn’t a luxury. It’s a necessity.
A typical 3D residential rendering service delivers 5 – 10 images per project: hero shots of main spaces plus detail vignettes of custom elements.
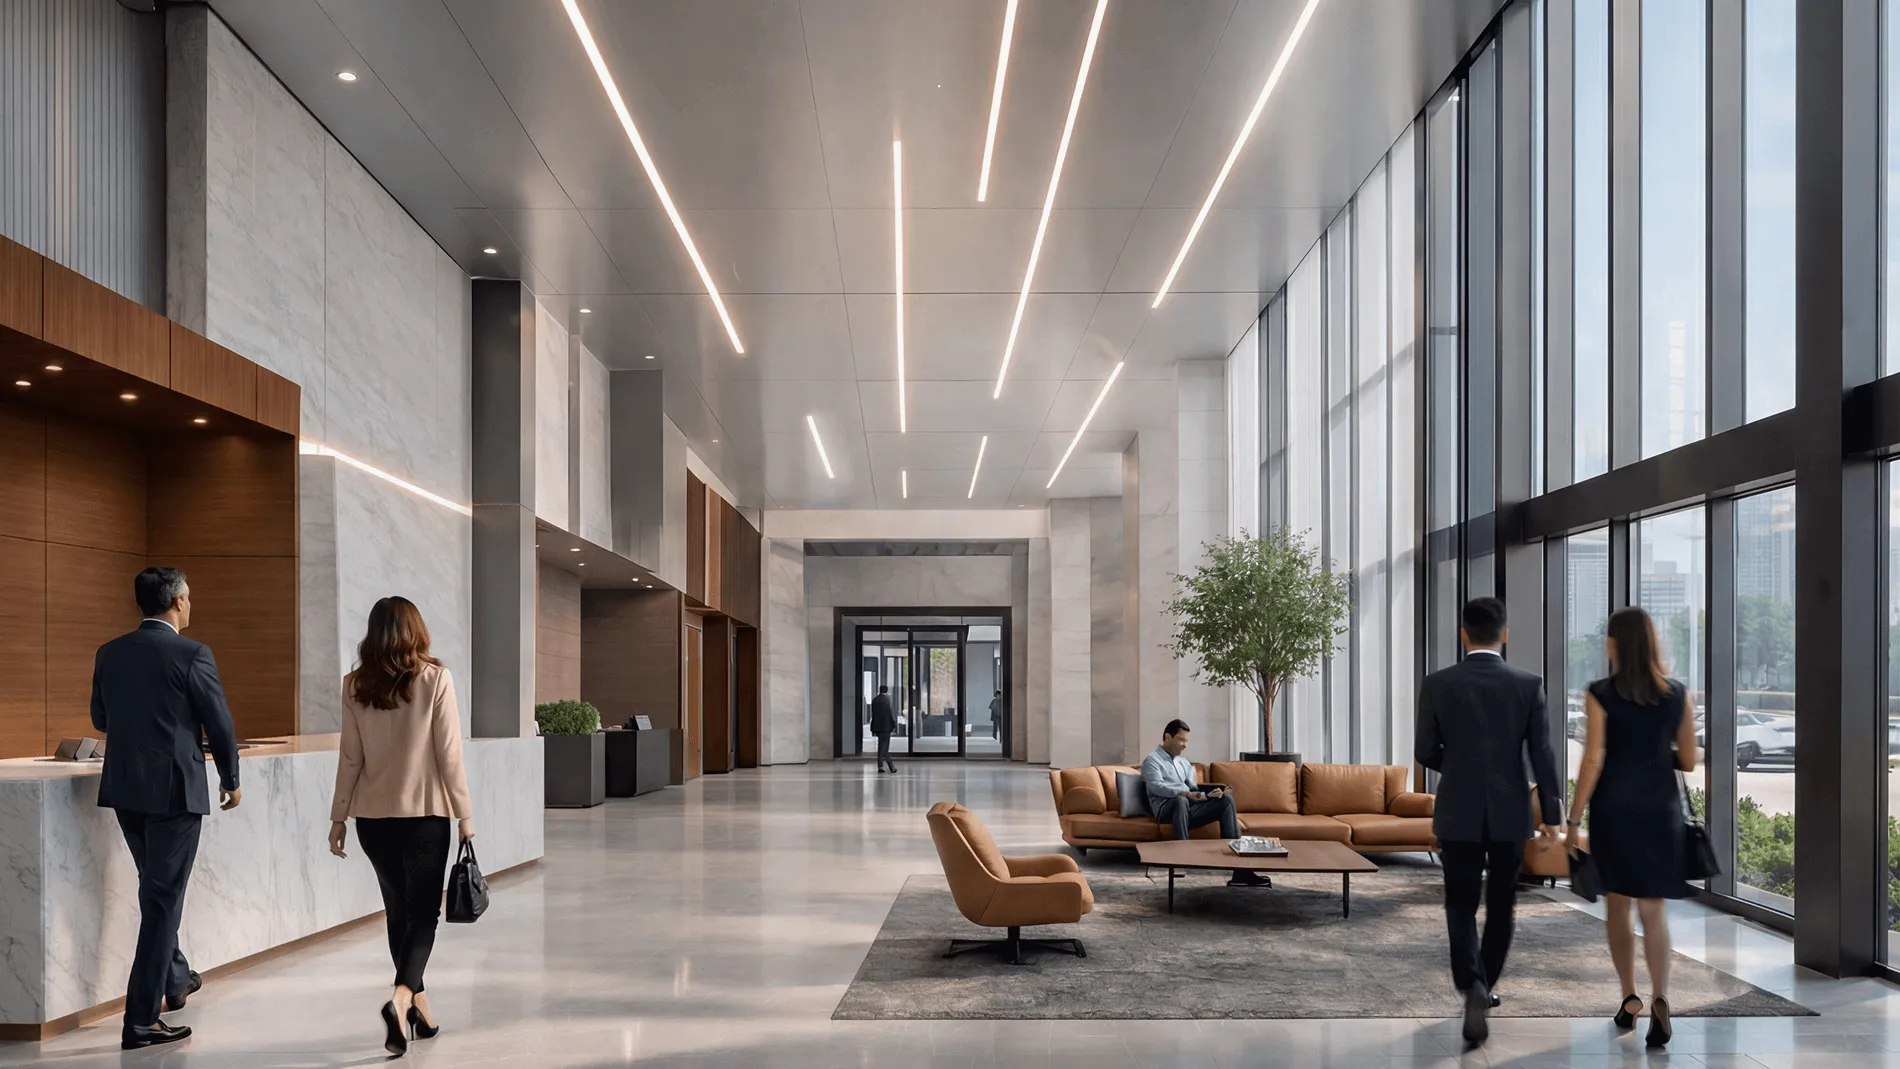
Commercial interiors such as offices and retail spaces
Corporate and retail clients use rendering to test branding integration, present to decision-makers who won’t visit during construction, and coordinate multiple contractor teams. Approval chains are longer in commercial work. Strong visuals cut through the committee.
Hospitality design, including hotels and restaurants
Hotels, restaurants, and resorts depend on interior 3D architectural visualization because the people funding these projects – investors, brand executives, ownership groups – need to see the finished product before they’ll write a check. Marketing teams also need images for pre-opening campaigns, often a year or more before the property opens. You can’t photograph a hotel that’s still a steel frame.
Real estate marketing and virtual staging solutions
Developers selling off-plan properties use rendering to market units that won’t exist for years. According to reports from the National Association of Realtors, staged homes are more likely to sell faster and can positively influence buyer perception and offer quality.
What Should a Designer Include in a 3D Interior Rendering Brief?
The brief is the single biggest factor in whether a project goes smoothly or turns into a revision marathon. Here’s what belongs in it.
Room dimensions, ceiling height, and key architectural features
Dimensioned floor plan (PDF or DWG)
Ceiling height, including variations – tray ceilings, beams, soffits
Material specifications: flooring, wall finishes, cabinetry, countertops
“Marble countertop” isn’t a spec. “Calacatta Oro, honed finish, waterfall edge on the island” is. Include product names, SKUs or links, finish types, and pattern direction.
FF&E list: furniture, fixtures, equipment, and décor references
Every item in the scene needs a reference. Furniture with brand and model. Lighting fixtures with specs. Décor – even approximate references help. Appliances with brand and model, especially in kitchens.
Lighting plan: fixtures, color temperature, mood, time-of-day
Day or evening? Bright and airy or warm and moody? 2700K or 4000K? Include reference images that show the lighting feel you want. Words are ambiguous. Pictures aren’t.
Revision rules: how to structure feedback to avoid delays
Agree on these before work starts:
Number of rounds included (2 – 3 is standard)
One consolidated feedback document from one point of contact
Clear distinction between minor revisions (color tweak) and major ones (layout change)
48-hour turnaround on feedback to keep the project moving
How Long Does 3D Interior Rendering Take?
Average production timelines per interior render
Deliverable
Timeline
Conceptual render
1 – 3 business days
Photorealistic still
3 – 7 business days
3D floor plan
2 – 4 business days
360° panorama
5 – 10 business days
Animation (30 – 60 sec)
2 – 4 weeks
Full virtual tour
3 – 6 weeks
These assume a complete brief and feedback within 48 hours.
Common factors that delay delivery
Incomplete briefs. Missing dimensions or unspecified materials force the team to stop and ask questions. Every question adds a day.
Scattered feedback. Five people sending five emails with five different opinions. The artist can’t move forward until someone consolidates.
Scope creep. “Can we also add the hallway?” sounds small. It isn’t.
Material indecision. A client who can’t choose between two countertops holds up everything downstream.
How to speed up delivery: templates, libraries, and approval checkpoints
Template scenes for recurring project types (one-bedroom apartments, standard hotel rooms)
Curated model library of furniture and fixtures you use regularly
Wireframe checkpoint – review the bare 3D model before materials and lighting go on. Catching layout problems here saves days.
Single feedback channel – one person, one document, one submission. This alone can eliminate an entire revision round.
What Makes a 3D Interior Render Look Photorealistic?
The gap between a render that looks “computer-generated” and one that passes for a photograph comes down to a short list:
Light that behaves like real light. Bouncing, scattering, and picking up color from surrounding surfaces. Photorealistic renders use global illumination to simulate all of this. Flat, even lighting – the kind you see in cheap renders – is technically correct but emotionally dead.
Imperfection. This matters more than anything else on this list. Real rooms aren’t pristine. Subtle wear on hardwood. Slight grout variation. Fingerprints on stainless steel. Linen wrinkles. Your brain reads these micro-details as “real” even when you’re not consciously noticing them.
Accurate scale. Furniture that’s 5% too big or a ceiling that’s six inches too low feels off, even if you can’t explain why.
Depth of field. Professional photos have a focal plane. Foreground and background go slightly soft. Renders where everything is uniformly sharp look artificial.
True-to-spec color. If the brief says Benjamin Moore Simply White, the render needs to look like Simply White. Not cream. Not generic off-white.
Strong composition. Same rules as architectural photography – framing, leading lines, what’s included, and what’s cropped out.
Post-production restraint. Over-saturated colors, heavy bloom, aggressive vignetting – dead giveaways of amateur work. The best artists enhance. They don’t overcompensate.
Should You Outsource 3D Interior Rendering or Do It In-House?
In-house vs outsourcing: cost, speed, and quality tradeoffs
Factor
In-House
Outsourced
Upfront investment
High – software, hardware, training
None – pay per project
Per-project cost
Lower at volume (10+ renders/month)
Higher per image, zero overhead
Quality
Capped by your team’s skill
Access to specialists
Scalability
Limited by headcount
Tap multiple studios as needed
Control
Full
Requires clear communication
When outsourcing makes sense for interior designers and studios
Fewer than 8 – 10 renders per month – not enough volume for a full-time hire
You need photorealistic quality, but your team tops out at conceptual
You’re growing fast and can’t recruit quickly enough
You need animation or VR deliverables outside your team’s skill set
How to choose a 3D rendering company: portfolio, process, revisions
When evaluating 3D interior visualization services, focus on:
Portfolio relevance – have they worked in your sector? Residential, hospitality, and retail each have different visual languages.
Process transparency – can they walk you through their timeline before you commit?
Revision terms – how many rounds, and what counts as a revision vs a change order?
Communication – dedicated project manager, or a generic inbox?
Technical range – stills, panoramas, and animation under one roof, or separate vendors for each?
Start with a paid test. One room. It tells you everything about quality, communication, and reliability before you’re locked into a bigger commitment.
Maintaining visual consistency across multiple projects
For ongoing studio relationships, set up:
A shared material library with approved textures and colors
A style guide for lighting, camera angles, and post-production
A standardized brief template
Periodic calibration reviews to stay aligned
Skip this setup work, and every project feels like starting over. Invest in it once, and the returns compound.
How Is Technology Changing 3D Interior Rendering?
Real-time rendering (Twinmotion/Enscape/Unreal): when it’s the best fit
V-Ray and Corona produce stunning images. They also take hours per frame. Real-time engines flip that – move the camera and the image updates instantly.
Works well for: live client walkthroughs, quick conceptual renders, VR experiences.
Falls short on: top-tier photorealism (though the gap is closing fast) and benefits from a modern dedicated GPU, especially for large or highly detailed scenes.
Most studios use both. Real-time for exploration and meetings. Offline rendering for final marketing images.
AI tools that accelerate interior visualization workflows
AI isn’t replacing 3D artists. But it’s making them meaningfully faster.
AI denoising can significantly reduce render times by allowing artists to stop rendering earlier while maintaining acceptable image quality.
AI upscaling – render at lower resolution, scale to 4K with minimal quality loss.
AI textures – tools like Substance 3D Sampler generate tileable materials from a single photo.
AI concept images – Midjourney and similar tools produce mood visuals, but they lack the dimensional accuracy needed for professional interior design rendering. Good for inspiration. Not for production.
Designers wondering how to do 3D rendering for interior design without years of training have options: Coohom, Planner 5D, and HomeByMe offer simplified workflows. You trade customization and photorealism for speed and accessibility – a fair deal for early-stage concepts.
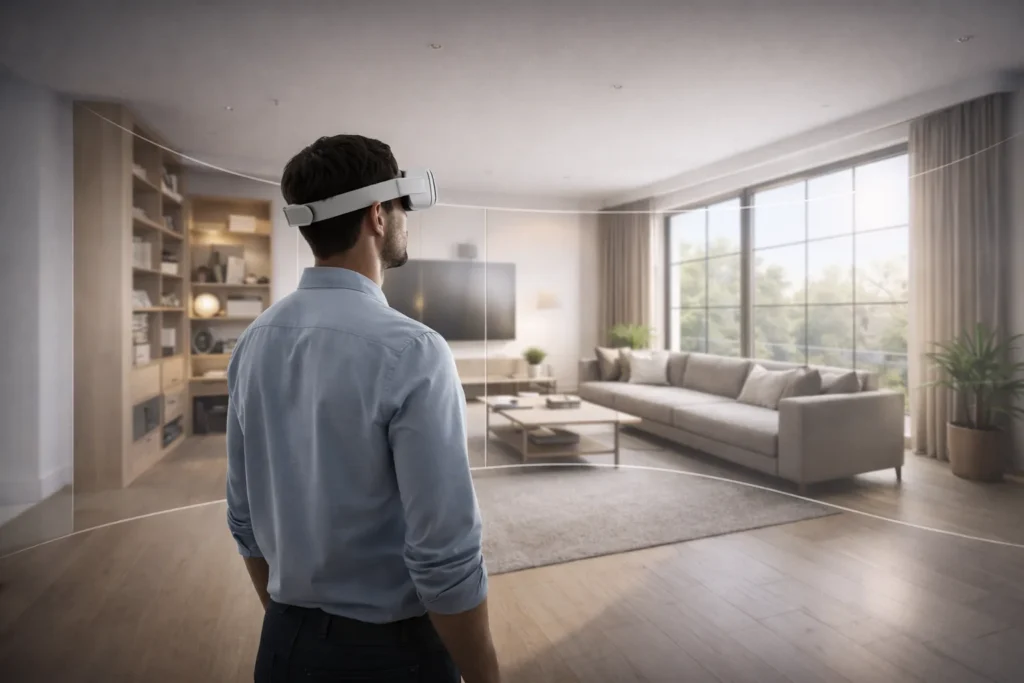
VR and interactive interior design presentations
VR is moving past the novelty phase:
Clients walk through their future home in a Meta Quest headset and understand spatial proportions in a way no flat image delivers
Designers evaluate ceiling heights and corridor widths at true 1:1 scale
Interactive presentations let clients swap materials and toggle lighting in real time
Hardware adoption is still the bottleneck. Not every client owns a headset. But browser-based 3D viewers are narrowing that gap steadily.
Workflow integration with BIM and CAD tools
Efficient studios run tight pipelines:
Revit/ArchiCAD → 3ds Max or Blender for final rendering
SketchUp → V-Ray, Enscape, or Twinmotion via direct plug-in
Rhino → Grasshopper parametric models into V-Ray or KeyShot
BIM integration keeps the render and the construction documents in sync. Few things erode client trust faster than a render that shows one thing and drawings that describe another.
If you’re planning a project where precision, presentation quality, and clear client communication matter, professional visualization becomes a strategic tool – not just a deliverable.
At GENENSE, we specialize in high-end 3D interior rendering for designers, architects, and developers who need visuals that hold up under scrutiny. We work directly from your CAD or BIM files, match real product specifications, and build scenes that feel believable, not staged. Whether you need fast conceptual visuals for internal alignment or fully photorealistic marketing imagery ready for investor decks, we structure the workflow around your timeline and approval process.
Most of our long-term partners come to us for one room and stay for entire project portfolios. If you’d like to test the collaboration, start with a single space. It’s the most practical way to evaluate quality, communication, and consistency before scaling up.
FAQ
At the professional level, very. High-end renders are regularly mistaken for photographs, even by designers. The ingredients: accurate light simulation, detailed materials, correct proportions, and deliberate imperfection. A skilled artist using V-Ray or Corona produces images that are, practically speaking, indistinguishable from professional photography.
Two to three rounds. First round handles the big changes – layout, materials, furniture. Later rounds cover refinement – color, lighting, styling. Extra rounds beyond what's included typically cost $50 – $150 each.
A photorealistic still runs $300 – $1,500 depending on complexity and studio. Conceptual renders start at $100 – $250. Animations: $3,000 – $15,000 per minute. Multi-room projects usually get 10 – 20% volume pricing.
A photorealistic still: 3 – 7 business days, brief to delivery. Conceptual work: 1 – 3 days. Animations and tours: 2 – 6 weeks. The biggest variable is brief completeness. Information gaps add days.
Industry standard: 3ds Max + V-Ray or Corona. Strong free alternative: Blender + Cycles. Quick conceptual work: SketchUp + Enscape. BIM workflows: Revit + Enscape or Twinmotion. The right pick depends on budget, skill level, and what you need the output for.
Not always. But when expensive materials are involved – custom cabinetry, natural stone, high-end fixtures – a $300 – $500 render is cheap insurance against a costly mistake discovered after installation. For very small scopes like paint consultations or accessory styling, you can skip it.
Dimensioned floor plan (PDF or DWG), ceiling height, material specs with product links, furniture selections with brand/model or reference images, and mood images. Most studios provide a brief template. Ask for it upfront – it saves both sides significant back-and-forth.
Rate article:
Nice
Average rating: 5 / 5
Vote count: 1
Denys Borozenets
CEO at GENENSE
Denys is the CEO of GENENSE Studio. His mission is to build an international community of passionate CGI professionals, where everyone can unlock their potential by creating high-end digital content that helps highlight any product on the global stage.
As a leader, he holds himself to the highest standard of responsibility - for both his own work and that of his team. For the members of GENENSE, responsiveness and open communication are the core values that drive their collective success.
3D product animation is the process of creating a computer-generated video that shows an item in motion – rotating, assembling, disassembling, functioning, or existing within a styled environment – using three-dimensional digital models rather than a physical camera. The product doesn’t need to exist. The environment doesn’t need to be built. Everything happens inside software, […]
3D exterior rendering is the creation of photorealistic digital images that show what a building will look like from the outside – its facade, landscaping, surrounding streets, sky, and atmosphere – all before a single brick is laid. If you’ve ever seen a gorgeous image of a proposed development on a real estate website and […]
A 3D walkthrough animation is a computer-generated visual simulation that allows viewers to virtually navigate a three-dimensional space as if physically moving within it. Created using specialized 3D modeling and rendering software, it presents a continuous sequence of frames that replicates the experience of moving through an architectural structure, landscape, or other designed space — […]
3D furniture rendering is the process of creating photorealistic digital images of furniture using computer-generated imagery (CGI) rather than a physical camera. A 3D artist builds a virtual replica of a piece of furniture – geometry, materials, lighting, environment – and the software calculates how light would behave across every surface, producing an image that […]
Why corporate headquarters need visualization that goes beyond “nice pictures.” Corporate headquarters are not just workplaces – they are strategic assets. Executive floors host investor briefings, R&D labs sit next to agile neighborhoods, and client areas must perform as brand touchpoints while meeting stringent acoustic, security, and wellness criteria. In this setting, office interior rendering […]
Why visualization makes or breaks a sports pitch Securing buy‑in for an arena, training complex, or campus rec upgrade demands more than attractive images. Decision‑makers need to understand how a building will move crowds, manage light and sound, and deliver revenue across game day and non‑event operations. This is where rigorous visualization turns vision into […]